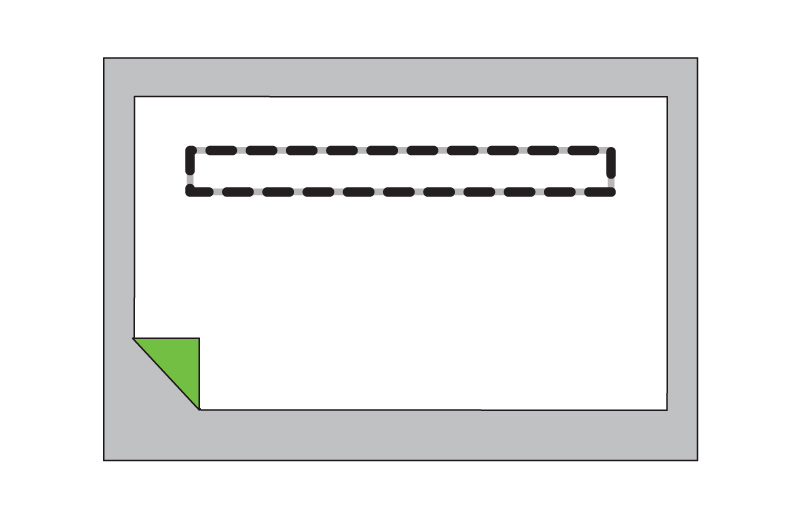
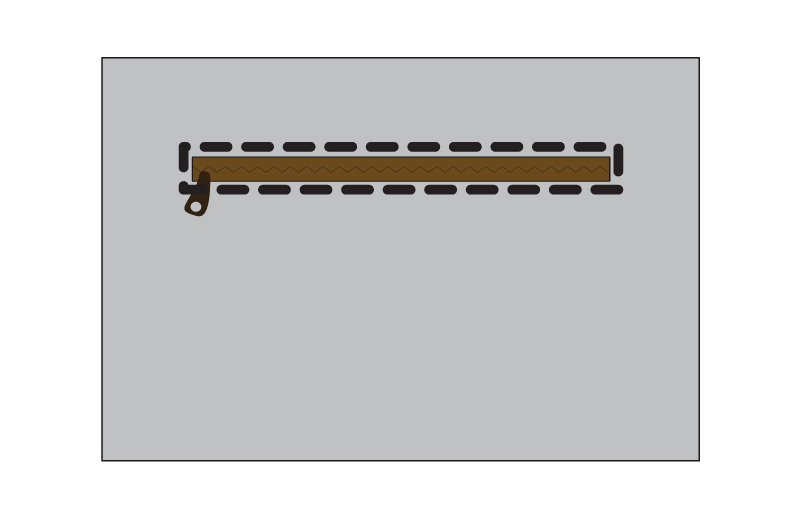
Step 1: Draw
Draw the zipper line onto the wrong side of the zipper pocket piece as indicated on the pattern.

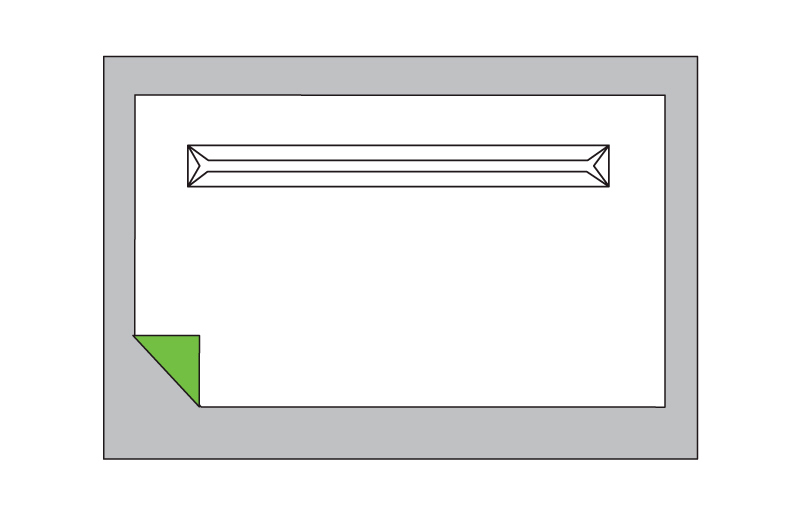
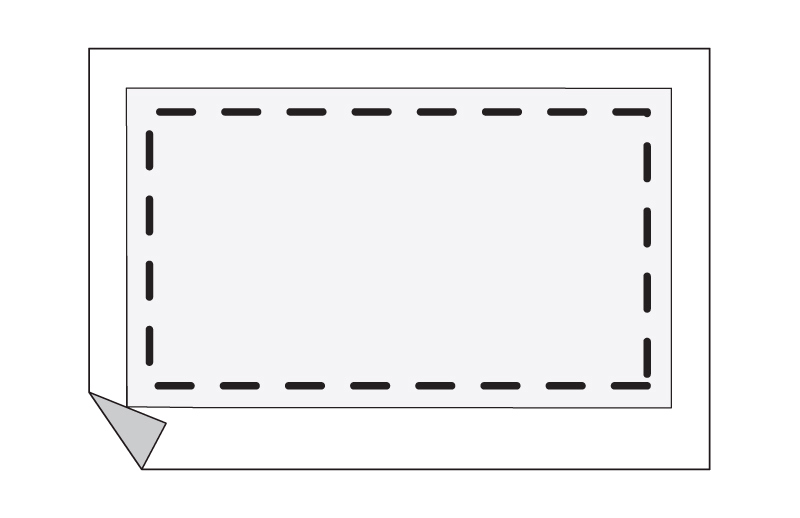
Step 2: Place & Stitch
Place the zipper pocket piece onto the fabric with right sides together. Pin and stitch in rectangular shape. Backstitch on starting and ending points.
Step 3: Cut
Cut out the inside as indicated on the zipper pocket pattern.
Step 4: Insert
Insert the fabric toward the wrong side of the lining.
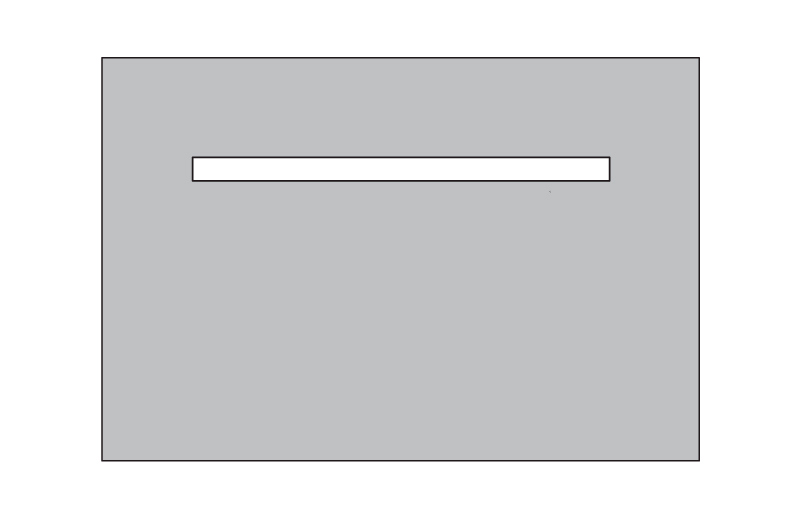
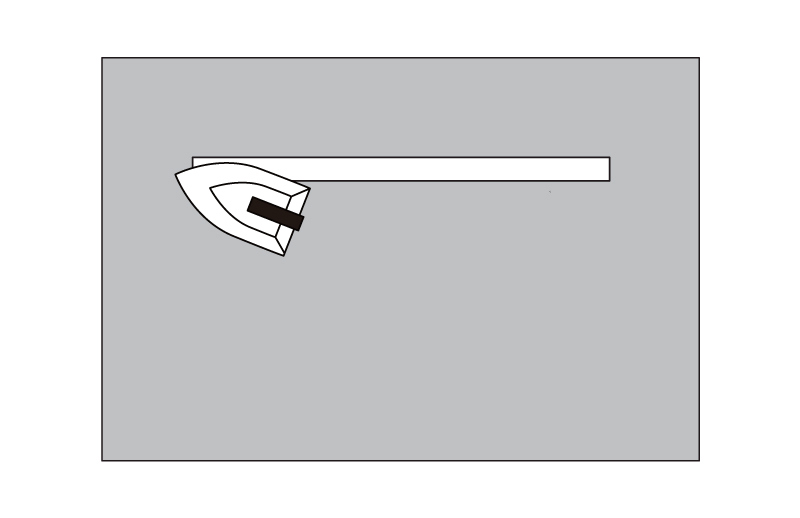
Step 5: Press
Press the seam. The right side of the fabric should look like the picture.
Step 6: Match & Pin
Match the right side of the zipper with the wrong side of the fabric. Pin in place and stitch in a rectangular shape on the right side of the fabric.
Step 7: Flip, Place & Stitch
Flip the fabric piece, so you can see the wrong side of the fabric. Place the other zipper pocket piece on top with right sides together. Stitch in a rectangular shape around the zipper pocket, stitching only the two zipper pocket pieces.
lainever - Monday, May 22, 2023
<p>I am on my phone and did not realized that an animation was included. The images are static. After reading the comments, I clicked on one image and the animation started. The instructions became clear with the animation but they were not before. I think it would be a good idea to specify somewhere that we may need to click on the image to start the animation.</p>
LK - Tuesday, May 9, 2023
<p>This is clear. The animation is helpful for those who might need a visual boost to envision the work.</p>
Joyce - Sunday, May 7, 2023
<p>The drawings and directions are clear, it's a quick simple install. I use zipper overlays in all my bags. I prefer that the zipper tape is not visible when the pocket is open, it's looks more professsional. </p>
Heike C. - Sunday, May 7, 2023
<p>This is so cool. I agree with the lady's on the instruction. <br /> Easy to follow and understand.</p> <p> </p>
Stitch - Sunday, May 7, 2023
<p>The instructions are very clear and easy to follow. I like it, but it does need to be printable.</p>
Holly - Saturday, May 6, 2023
You are actually placing the right side of the zipper to the RIGHT side of the ZIPPER POCKET PIECE.
Holly - Saturday, May 6, 2023
I believe it would be clearer to say “Place the right side of the zipper to the RIGHT side of the ZIPPER POCKET PIECE”
Holly - Saturday, May 6, 2023
<p>Other than step 6 (see those comments), this is quite clear and helpful.</p>
Holly - Saturday, May 6, 2023
I agree with Christina re the text “Match the right side of the zipper…” you are actually matching it to the RIGHT side of the ZIPPER POCKET PIECE.
CBarney - Saturday, May 6, 2023
<p>The instructions are clear, simple and practical.</p> <p>I often make the piece twice as long as I want the pocket to be deep, then fold it up to align to the top, then stitch the 3 sides. To me, this is a "stronger" solution as there is no seam at the bottom of the pocket to open up</p> <p> </p>
Chris - Friday, May 5, 2023
<p>These instructions are exactly how I was taught how to install a zipper and still my preferred method. </p>
jwcamenisch - Friday, May 5, 2023
<p>I really like the way it looks - but is it printable? I don't usually have my computer open while I sew.</p>
LakesideSewing - Friday, May 5, 2023
I totally didn't recognise the zipper! I overlooked the hanger and only saw an olive filling in the rectangle with a zigzag line that I would interpret as a zigzag seam in another context.How about making it another colour and, more importantly, giving it realistic teeth? Already a representation as a simple long horizontal line with lots of short parallel, vertical lines crossing it would be easier to recognise (or is the way you drew it a standard representation in sewing patterns and it's only me who isn't aware of that?)
LakesideSewing - Friday, May 5, 2023
"Match the right side of the zipper with the wrong side of the fabric." How about something like: "Match the right side of the zipper pocket piece with the right side of the interior piece". Talking about the "right side of the zipper" sounds like the actual zipper is meant (and not the fabric piece).
LakesideSewing - Friday, May 5, 2023
How about giving some tips on how to best go about this? E.g. by using a seam ripper, by cutting those short diagonal line from the corner points inwards...
LakesideSewing - Friday, May 5, 2023
If I was making my first zipper pocket, I think I might struggle with understanding the picture. It's perfectly clear the way it is, but I remember how I was a bit lost when I made my first bad. So how about making this step crystal clear by showing an in between step in which the fabric has been pulled partly through the slit? I'm aware it'll be a nightmare to draw something like that, but it would make that step so much clearer. (Especially since the next step shows the very same picture plus the iron - there doesn't seem to be anything happening from this to the next step.)
LakesideSewing - Friday, May 5, 2023
"Place the zipper pocket piece onto the fabric with right sides together." How about stating explicitly what piece of fabric is meant with "onto the fabric", namely that interior piece on which the zipper has been drawn (which will have been sometime earlier in another part of the instructions).
LakesideSewing - Friday, May 5, 2023
How about suggesting that sewist use seam ripper for this? Maybe even add some instructions on how best to do this, e.g. how best to do this short diagonal lines.
LaGene - Thursday, May 4, 2023
<p>For this method, your I tructions are clear and the drawings are great!</p>